

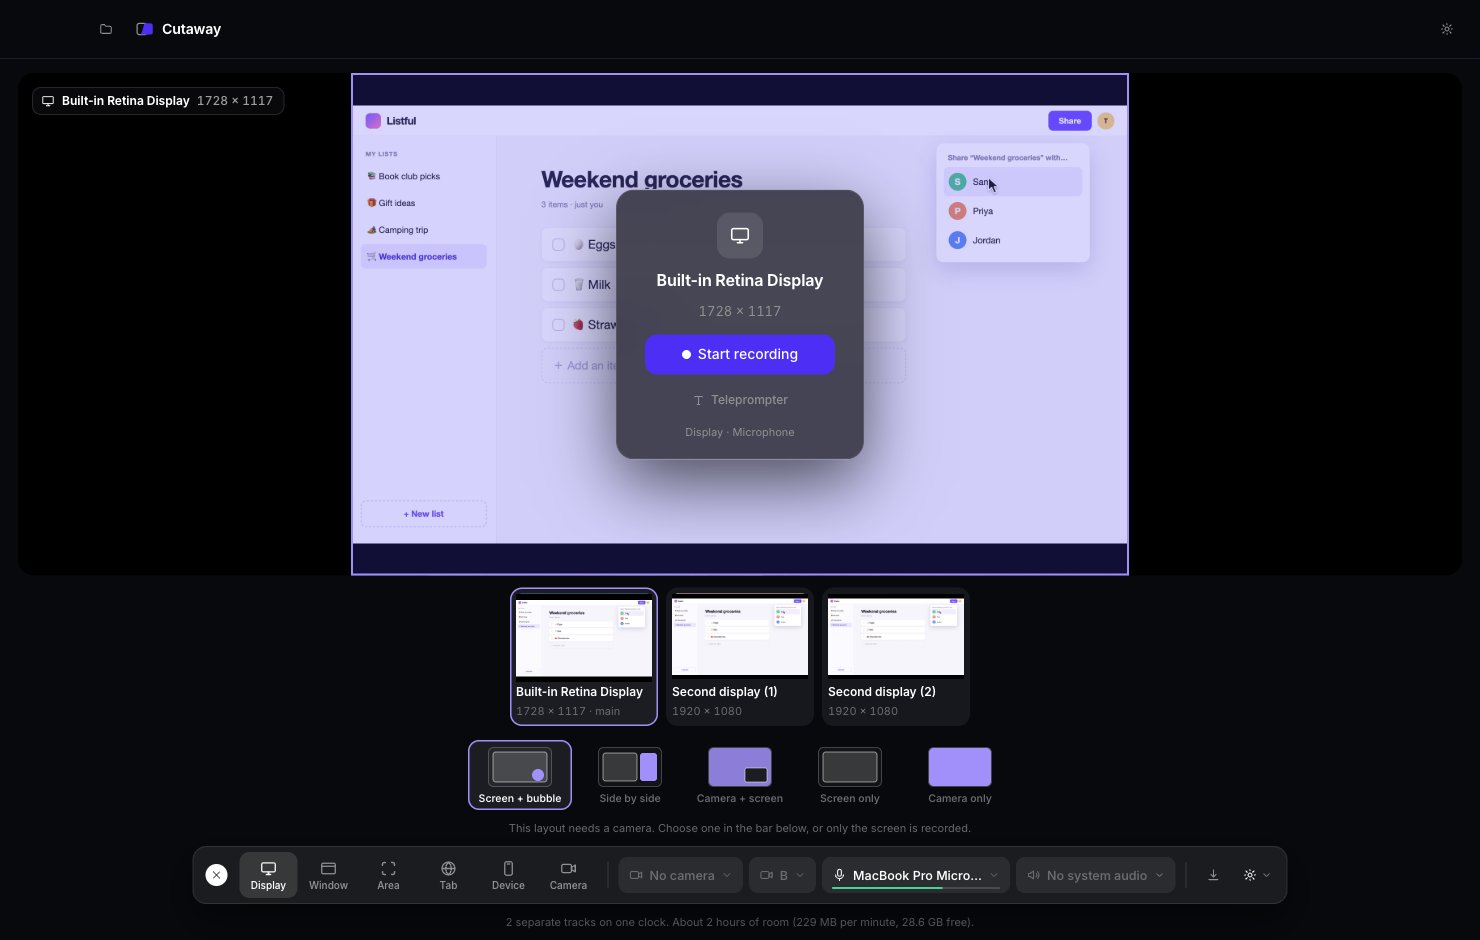
Open the recorder
On the Projects screen, press New recording. (Shortcut: Command + N.) The big picture at the top shows exactly what will be recorded.Choose what to record
Use the buttons on the left of the bottom bar:Window: resize to a standard size
In Window mode, a Resize menu appears next to the window’s size. Pick a size like 1920 × 1080 and Cutaway resizes the real window for you. This needs Accessibility access: turn Cutaway on in System Settings → Privacy & Security → Accessibility.Tab: keep the tab in front
Tab mode records the browser window and leaves out the tab strip and toolbar. So keep that tab in front while you record. If you switch to another tab, that’s what gets recorded. If a strip of toolbar still shows, change Trim top until it’s gone.Device: record your iPhone or iPad
Connect your iPhone or iPad with a cable, unlock it, and tap Trust on the device. It shows up a few seconds later. Until then you see No iPhone or iPad connected.Touches on your phone aren’t recorded like a mouse cursor. So Cutaway can’t add automatic zooms to device recordings.
Add your camera and microphone
On the right of the bottom bar:- No camera: click it and pick your camera if you want your face in the video.
- B: a second camera, if you have one. You can skip this.
- No microphone: click it and pick your microphone so your voice is recorded.
- No system audio: click it if you want to record sounds your Mac plays, like a video or app sounds. Choose Record system audio from all apps, or Record from selected apps and tick the apps you want.
Record
1
Press Start recording
A countdown appears on the screen you’re recording, so you have a moment to get ready.
2
Do your thing
Show what you want to show and talk as you go. Pauses and mistakes are fine. Cutaway can remove them later.
3
Press Stop
A small control bar floats on your screen while you record. Press the stop button on it. A Recording saved box appears.
- Pause: take a break, then press it again to resume.
- Flag: mark a moment so you can find it later (shortcut from any app: Control + Option + F). Flags show up on the timeline. In the editor, press [ and ] to jump to the previous or next flag.
- Teleprompter: show or hide your script in a floating window while you talk. Only you see it.
- Camera bubble: show or hide a small mirror of your camera, so you can check how you look. It’s never recorded, and your camera keeps recording either way.
Recording options
Click the gear at the far right of the bottom bar for more options:- Hide desktop icons: leaves your desktop icons out of the recording. Your desktop isn’t changed.
- Hide notifications: leaves notification banners out of the recording.
- Record keyboard shortcuts: records the shortcuts you press, so they can show in your video. The letters you type are never saved. Needs Input Monitoring access.
- Record Cutaway too (for demos): keeps Cutaway open and in the recording, so you can show how it works. See Record a demo of Cutaway.
- Teleprompter: turn your floating script on or off. See Teleprompter.
- Show my camera while recording: show the camera bubble while you record. Only you see it.
- Frame rate: 30 fps or 60 fps. 60 looks smoother.
- Cursor: Clean records the mouse pointer separately, so you can smooth or resize it later. Baked in makes it part of the picture, and you can’t change it afterwards.
- Countdown: how long to wait before recording starts.
What happens next
When you stop, a Recording saved box appears. Your take is already in your project, and nothing has been uploaded. Pick what to do:Recording into a project that already has video? Your new take is added to the end of the timeline. Press Use as B-roll instead to keep it in Sources without putting it on the timeline.